Search This Blog

Wednesday, November 2, 2011

Pressing Apples: Autumn in the Palouse

What would autumn be without apples?  Harvests?  Crisp air that mimics the bite of that perfect honeycrisp?

I love autumn, and I love where I live.  In eastern Washington it's farm country, and while we celebrate every harvest here (we even have a National Lentil Festival) it's apple harvest that's my favorite.  Why?  I get to wear sweaters, autumn leaves are beautiful and fresh pressed cider is amazing.

A few weeks ago I went with some friends to Bishops' Orchard to press cider.  They have old fashioned apple presses, so it's all done with your own sweat and toil.  You wash the apples, chop them up, and then press them to make juice.  One bucket is ~ 1 gallon, more or less.  From these gallons I am making hard cider.  Hard cider is so easy.  Fill your carboy with 5 gallons apple juice.  Crush up 1 campden tablet for each gallon, add those to neutralize the local yeasts and bacteria.  Boil a little honey in water, add that.  Wait a few minutes, add a white wine yeast.  Done.  Really, that's it.  After brewing beer for so many years it's a welcome change.  So... easy!

Well, I had one extra gallon that I knew what I wanted to do with: I made apple syrup.  All you do is boil down 1 gallon of apple juice to about 1 quart of syrup.  Just leave it on the stove, cooking away.  The sweetness all comes from the natural flavor of the apples.  I then added 1 jigger of whiskey for preservative.  So simple.

It's still harvest time out there!  We haven't had a deep enough freeze to kill the apples, so everyone go out and get your fresh pressed juice!


Sunday, May 29, 2011

My mom's blackberry pie a la mode cupcakes


I am not one to shy away from a challenge, so when I saw Cupcake Project/Scoopalicious's 2011 Ice Cream Cupcake challenge I started fantasizing, nay, dreaming about the best possible ice cream cupcake I could make.

(For the original announcement please see http://www.cupcakeproject.com/2011/05/announcing-2011-ice-cream-cupcake.html  and
 http://scoopalicious.blogspot.com/2011/05/announcing-2011-ice-cream-cupcake.html)

The only problem with this: I'm not a huge fan of cupcakes.

I know I know!  Why would I enter a cupcake contest if I didn't really love cupcakes?  Well, it's not that I dislike them, I'm just picky.  First off, I don't like regular frosting.  However, in my humble opinion I have the best cream cheese frosting recipe ever.  So check one to the frosting.  Second, I love pie.  Obsessively.  I love pie.  But pie with cream cheese frosting?  Weird.  I do have a killer spice cake recipe, but spice cake a la mode with frosting, boring.  I needed something with more... spice. :)

I heard about this competition while I was visiting my beautiful grandmother in St. Louis, MO.  Maybe the familial nostalgia started overtaking me, but I came up with the best idea ever (I personally think):

Blackberry pie a la mode cupcakes.  My mother's blackberry pie recipe married to cream cheese frosting, with a blackberry vanilla ice cream, butter based flakey and savory pie crust and the moistest spice cake known to man.

So, this recipe took some time.  I had to decide what stratigraphy to put everything in.  I didn't want to just dig out a hole in the middle of the spicecake.  As an archaeologist this offended my perfectly square unit sensibilities.  I wanted in tact stratigraphy, not some ice cream scoop krotovina tarnishing the former beautify of the levels.  So here's what I came up with:

Pie crust "wrappers" (I've done this before for hand-held pies)
Blackberry pie filling
A layer of ice cream
"muffin tops" of cake
icing
berry

First things first.  We need to make the spice cake muffin tops.  Here's what you need:


  • 1/2 cups cake flour


  • 1/2 teaspoons ground cinnamon


  • 1/4 teaspoon baking soda


  •  pinch of salt


  • 1/8 teaspoon ground allspice


  • 1/8 teaspoon ground ginger


  • 1/8 teaspoon ground nutmeg


  • 1/4 stick unsalted butter, room temperature


  • 1/3 cups (packed) golden brown sugar


  • 1 large egg, separated


  • 1/4 cup sour cream


  • Preheat oven to 350*.  Sift first 7 ingredients into small bowl. Using electric mixer, beat butter in large bowl until fluffy. Add brown sugar and beat until well blended. Beat in egg yolk. Beat in flour mixture in 3 additions alternately with sour cream in 2 additions. Using clean dry beaters, beat egg white in medium bowl until stiff but not dry; fold into batter in 2 additions.  Pour this into 12 well greased muffin tins (the same tins you will use for making the final cupcakes).  Bake for 15 minutes or until toothpick inserted comes out clean.  Remove and let cool.


    Meanwhile, make some pie dough.  I mix 1 1/4 cups flour, 1/2 tsp salt with one stick of COLD butter until the mixture resembles coarse corn meal. Add tablespoons of ice water until the mixture is sticky but not too sticky and forms a cohesive dough.  The trick to good pie crust: wrap in plastic wrap and stick in the fridge for 1-3 hours.  It helps the gluten rest.  I made the crust into 12 identical size balls (I think of them as grape shot) and leave them in the fridge.  See the picture.


    Then mix together 1/4 cup flour with 1/2 cup sugar and some cinnamon and nutmeg.  Place aside.


    Get one of those small containers of blackberries.  Reserve 12 blackberries (the prettiest ones).  Smoosh the rest of them in a bowl and reserve.


    Roll out your 12 identical sized pie crusts into rounds and place into well-greased cupcake tin.  Sprinkle a 1/2 tsp of flour/sugar mixture in the bottom, then add a tbsp or so of blackberry moosh into each of the floured pie crust rounds.  Then sprinkle the rest of the flour/sugar mixture evenly over the smooshed blackberry mixture.  The flour mixture will help the blackberries to not weep everywhere.  


    Anyways, melt a little butter, wash the pie crusts in butter and bake at 350* for 15 minutes or so, until the crusts are a little golden.


    Pick your favorite icecream.  I got Tillamook's "marion berry pie" ice cream.  Keep it out of the fridge while the crusts are baking so it can soften.  When the crusts/pies are cooked place them into the fridge ASAP so they can cool.  Then spoon in semi-melty ice cream and add the "muffin tops" of cake.  Place in freezer.


    While these are freezing, make the frosting, which is as follows:


    • 1/3 8-ounce packages cream cheese, room temperature
    • 1/3 stick unsalted butter, room temperature
    • 1 cups powdered sugar (about 1 1/4 pounds)
    • 1 tablespoons sour cream
    • 1 teaspoon vanilla extract

    Whip the butter in the electric mixer. Add the cream cheese and beat then beat in sugar, then sour cream and vanilla.  Spoon this delicious mixture into a pastry bag and put in the fridge for about an hour until it's cool.

    When the frosting is cool decorate your cupcakes; I used a "lattice-work" design to mimic a blackberry pie.  Add a berry on top.

    I brought these cupcakes to a few friends, my advisor and some colleagues.  Everyone texted/emailed/called me to say "Oh my god!  These are so good!"  And despite the fact that they have so many steps they are so easy to make... you just have to do all the steps and put them together.

    And check out the final product.  Look at that stratigraphy!  Amazing, eh?

    Tell me if you make them!


    Friday, May 13, 2011

    Airport blues

    I have done so much traveling this year.  And right now I find myself in the Salt Lake City airport hoping that my flight into Chicago is not delayed any more.  I have flown through this airport quite a bit in my life, and if you haven't been here you need to know that the whole airport smells like Cinnabon.  It's absolutely criminal.  Have you ever had something that smells as deliciously evil as Cinnabon but tastes so disappointingly like gooey plastic?  I did not fall into the temptation today.  Instead I got some tea and a cookie.  Unfortunately when I'm bored I eat.  Yet hooray for free wifi!

    Like I said, this year has been a traveling year for me.  It all started back in August when I went to Los Alamos for some archaeological site revisitation.  It was a fantastic archaeological adventure.  A few months later I found myself in New Orleans for the American Anthropological Association meetings.  This was quite the culinary adventure!  I'm pretty sure I gained 10 lbs in 4 days.

    Over Christmas break my boyfriend and I flew to Puerto Vallarta where we stayed for two weeks and ate fresh amazing Mexican food.  This was only my second trip to Mexico and I loved it.  We returned and three weeks later we took off to Paris for a 10 day sojourn (I had a conference to attend with some amazing French archaeologists).  Two weeks from returning from that I went to Washington DC where I ate amazing Ethiopian food, and then 3 weeks later I took off to Crescent City to visit my boyfriend who was working in the area.  The tsunami struck there 3 or 4 days before, so there was a strange surreal vibe to the place.  After that, down to Sacramento for some more meetings!  Now I'm on my way to Chicago to visit an archaeology friend and then St. Louis to visit my grandmother.  *phew*

    All this traveling can really wear on a girl, you know?  And this bad bad airplane/airport food can suck away at ones soul.  But thankfully everywhere I have been this year has been a delicious adventure!  My favorite meals this year were:

    Los Alamos:  New Mexico green chile stew!  Amazing, delicious, and boy I miss living somewhere where I can get these things!  This summer I'm planning on heading to Pie Town, NM to check out their New Mexico green apple pie, made with green chiles and pine nuts!  My lovely friend Natalie made one for me in December.  It was incredible!  Check out the pie-o-neer cafe for some of their amazing pies. http://www.pie-o-neer.com/pies-at-pioneer.html

    New Orleans: Wow, this is a hard one!  Oysters at the Acme oyster company were amazing, as were the BBQ shrimp (ingredients: butter and worcestershire sauce) at Mr B's.  However, my favorite meal was actually at a mexican/NOLA fusion restaurant (sacrilege, I know!)  You see, I had been to NOLA for the Hurricane Katrina relief efforts, and my father and I cook NOLA food quite a bit, so this burrito took me by surprise!  Roasted garlic, sweet potatoes and so much else.  It was a masterpiece of epic proportions and goes to show that NOLA chefs are ready to push the boundaries of all kinds of food!  I also took a cooking course when I was there my last morning and learned to make so many things correctly.  We ate here: http://www.juansflyingburrito.com

    Puerto Vallarta: The pie in Yalapa was amazing!  The "market food" of carne asada and milkshakes.  Oh my, how delicious!

    Me sipping a cocktail at one of my favorite haunts in Paris
    Paris: additionally, really difficult to decide.  The food at Les Fetes Gallantes was incredible, as always.  My friend Bibi is the chef extraordinaire and he did not disappoint.  I had tongue at a cafe in the 14th, rabbit in the 4th, escargot, fondue, absinthe (the real kind), hot wine on the street and crepes crepes crepes!  Oh, and a foie gras salad on the Champs Elysées with the conference participants.  It was a magical 9 days of food!  It was however a high of 25* F when we were there, so Paris was cold!  But that didn't make it any less charming.  I even brought back some Paul croissants to my classmates when I flew home.

    DC: The Ethiopian food!  My friend lives at the border of the old Ethiopian town in DC so there was no paucity of amazing food.  We can't get this kind of food in Pullman, so I gobbled it up with gusto.

    Crescent City: really, I don't remember too much.  We cooked in mostly.  We rented a beach house for a few days.

    Sacramento: WOW this town has revived itself!  I used to drive through and try to find *anything* that was open.  It's really much better now!  Our favorite was a British pub where I tried Scotch Eggs for the first time.  Yum!

    Now I'm off to Chi-town and St. Louis!  Adventures to be had by all!

    Tuesday, May 10, 2011

    A word about spices

    A picture of long pepper, one of the spices
    traded by the seaport of Broach from
    India to the Roman Empire.  It looks
    like odd pine cones, but smells and
    tastes better.  Trust me.
    Yesterday a second box of spices arrived in the mail, this one from Penzeys.  I made room for them in my newly organized spice drawers and basked in the glory.  And then I remembered all my friends who don't own many spices and I felt a bit sad.  So, I thought I'd write about spices here.  As an archaeologist I feel well qualified to write about the history of the spice trade.


    When people think of the spice trade they think of colonialism and more specifically the British Empire.  However, the spice trade has much deeper roots than that.  For thousands of years people have wanted tasty food.  Do you blame them?  Why have bland mutton stew when you can have tasty mutton stew?  To be completely self serving and insert a bit of academe into here, I'm currently working on an article talking about the interactions of hunter-gatherers with agriculturalists.  But the following bit talks about the spice trade.


    "The ancient seaport of Broach linked India to the outside world starting from the 1st century A.D.  Despite its relative inaccessibility, the preponderance of material wealth from this port shows that merchants braved the shoals and difficult currents to have access to the Indian interior and the lucrative position of supplying material wealth to distant states.  Many products, such as spices (e.g. nard, spikenard, costus, longpepper) were supplied to Broach during the first to fifth centuries A.D and were probably gathered by Indian hunter-gatherers (see Stiles, 1993 for more info)."  (from as of yet unpublished Crabtree, Stefani publication).  


    So, from this we gather that Rome was venturing to India to get things to make tasty food!  Spices were so valued from then on that in the French court in the middle ages you could seduce someone with pepper; indeed pepper weighed more ounce per ounce than gold.  People killed and died for spices.  And of course, let's not forget our buddy Christopher Columbus who was trying to find a passage to India not for gold and silver but for spices.  (If you want to read a good novelization of the spice industry, The Moor's Last Sigh by Salman Rushdie will do well).


    So, we have at least 2,000 years of history (there are many many more years of history, dating back back back to Egyptians, Mesopotamians, Chinese etc) here riding on our shoulders of our ancestors going to all lengths for tasty food.  So why then do so many people own three "spices:" iodized salt, lawrey's season salt and some lemon pepper (and if they're being adventurous some dried parsley)?


    I think they just don't know about spices and are afraid to experiment.  Also, how intimidating is a grocery store spice aisle?  First of all, it's put right next to the canned frosting.  I avoid this aisle like the plague.  I have a weakness for rainbow chip frosting and I try to not buy it.  Also, the aisle smells like canned frosting.  This is a very odd smell.  It's a blend of high fructose corn syrup, red dye #40 and failure.  So while you're trying to imagine what will really bring out the flavors of that juicy rib eye you just bought you're smelling a nightmare.  No wonder you can't quite picture it!  Finally, spices in the supermarket are expensive.  I almost choked once when I popped over to the supermarket because I ran out of something and found that the store brand of it was $12.  I'm sorry, TWELVE freaking DOLLARS?!?!  It's ridiculous.  


    Thankfully I lived in Boulder the last few years so I got to learn about the glory of Savory Spice Shop. I remember the day it opened and how excited I was!  This place is a friendly, inviting space.  When it first opened I was broke; my then-roommate (amazing chef Susanna Minichiello) and I would go smell (and taste!) the spices and we wouldn't get kicked out!  It smells like the best restaurant you've ever been to.  They get fresh ingredients, grind their spices daily and blend things by hand.  The proprietor in the Boulder shop looked exactly like Judge Reinhold (I find that comforting) and is the nicest, chillest man alive.  I'm pretty sure he is the chillest man in Boulder who does not run one of the now-ubiquitous "Medical" marijuana stores.  


    So, best of all, the spices there are less expensive than at the supermarket.  By a lot in many cases.  Sure, some things are more expensive (fancy cinnamon at Savory versus a giant plastic canister of cinnamon that was ground by child labor in 1972 that you can buy at your local supermarket) but by and large you're going to save money.  Why?  The spices you buy there are fresh so you don't need to use as much--a little can go a looooong way in flavoring food.  Also, that's all they sell (well, and a few spice related gadgets).  Specializing can be an optimal way of doing things, minimizing costs by increasing efficiency (yes, for you anthro geeks, I definitely just wrote about Optimal Foraging Theory here).


    True, when I go in I spend $50 on spices, but that's because I write a list and buy everything at once.  Also true, you are more likely to notice spending $50 on spices when you go there because that's all you buy.  When you go to the supermarket and are buying $150 of groceries and $50 worth of crappy spices you won't notice because it's in the rest of your gargantuan bill.


    Moral of the story: buy good spices.  Your ancestors will thank you.


    So where to buy them?  Well, like I said, I love Savory Spice Shop, but there are others that I frequent as well.  I recently began a love affair with Penzeys; I don't like their Boulder store layout as much as Savory (and their sales clerks don't look like 1980's heart-throbs), but their spices are absolutely top-notch, they are a tried and true company and I buy their spices frequently (as is evidenced by the package I just got from them).  I will have links to all of these at the bottom.  I also recently discovered the Milford Spice Company.  I am very impressed with their blends!  And when I go to Seattle I go to the World Spice Merchants (I don't like how they package their spices though, and transfer them as soon as possible to glass jars).  I'm picky.


    Readers: do you have some favorite spice shops I should try out?


    Also, I just figured out how to see the "stats" of who has viewed my blog.  300 views yesterday (and that's not counting me)!  I hope you are enjoying it.  I just fixed the "comment" box so that anyone can comment (including anonymous readers) so feel free to post.


    So, the spice shops:


    http://www.savoryspiceshop.com/
    http://www.penzeys.com/
    http://www.milfordspice.com/
    http://www.worldspice.com/


    I hope this brings a little spice into your life!  Hahaha!  Pun definitely intended!

    Monday, May 9, 2011

    Parties, panna cotta and lox

    Hello friends,

    This weekend I had a wonderful garden party for all of my friends who graduated. The party was an amazing success! I usually am in bed by 10:30pm, but I stayed up until 2:30am talking with my friends. Two friends stayed the night (a walk home at 2:30 sounded terrible) and in the morning we woke up and had coffee and crepes. It was a wonderful experience, magical and awesome and I felt so loved all day yesterday.

    Thankfully the weather cooperated and gave me enough sunshine on Saturday that we could all hang outside. I spent hours in my backyard this past week; there is an area behind the grass that is a sloping hill that heretofore was a mess of brambles, old yard clippings and broken bottles. I donned my gardening gloves and cleaned up the mess and created a very liveable space. This is just phase one, but after moving all the debris, setting up some lawn chairs and purchasing solar fairy lights the area is a magical forest of awesomeness. I invite everyone over to experience the glory.

    Now on to the food. What good is a food blog without all the food?

    First off, at the suggestion of Portland based rock star Dave Depper I made some lox. Dave made lox last month and his rhetorical question to the realms of facebook "why haven't you made this?" made me wonder why I hadn't. So I looked up a few recipes and figured out how easy it is. All you need to make lox is: salmon, salt, sugar, spices and a really heavy weight. That's it! So, the golden ratio of preserving is: 1/2 cup sugar, 1/2 cup salt. Mix these together in a big bowl. I used NW Alder smoked seasalt (available here) and ground it myself and mixed it with organic cane sugar. I then added a bit of long pepper (also from Savory Spice, linked above) which I also ground myself. Then I added some dried dill my father grew and harvested for me. I packed it on and then cut the salmon in half and folded it lengthwise. I then wrapped the salmon is saran wrap, keeping one side open, and laid it in a baking dish. Then came the hard part: finding something heavy that would put pressure on the fish evenly that would fit in the other baking pan.

    I wandered my house to no avail (my man took his handweights with him to the field) and decided to see if there was a heavy rock out back. But LUCK! There was a decomposing cinder block that fit perfectly in my baking pan! I got a bucket of hot and soapy water and took to scrubbing the cinder. My neighbors came out. Oblivious to their stares, they finally said "Um, Stefani? What are you doing?" And I replied "I'm washing a cinder block. Obviously."

    I took the cinder block inside, set up my fish in a baking pan, baking dish on top, cinder block on that baking dish, and then found some old socks and propped one end of the contraption up so the juices could drain out. Fastforward 48 hours, the fish is done! Unwrap and wash the sucker clean. The next hard part came with cutting the fish. My grandmother bought me a mandolin, and I tried that, but it really works much better on vegetables and the fish was just gumming it up. So I spent 20 minutes sharpening a knife (note to self: ask for sushi knife for birthday!) and then finally I was able to cleave the meat away in nice pieces. I placed all the pieces in the tray, sprinkled them with a little lemon juice, and liberally sprinkled with dill. These will be served on rosemary crackers this afternoon with the clotted cream for my proper tea.

    I also made a yogurt based panna cotta this weekend, flavored with saffron, vanilla bean and cardamom, inspired by a recipe from the cookbook Eat Well. All you need is:
    2 packets unflavored gelatin
    1.5 cups milk (2% or higher)
    1 vanilla bean, split lengthwise
    3/4 cup sugar
    orange or tangerine zest (I used tangerines in this)
    2 cups plain yogurt, whole fat or partial, but not non-fat

    So, first step: separate out 1/2 cup milk and sprinkle contents of one packet of gelatin onto the milk. DO NOT STIR! Let it stand for 10 minutes as it is for the gelatin to moisten.

    Pour the rest of the milk (1 cup) into a small saucepan over medium heat. Scrape seeds from vanilla bean into the milk and add the ground up inner seeds of the cardamom. Add the vanilla bean pod, 1/2 cup of sugar and the zest. Stir until the sugar dissolves in (took a while since I use big granules of sugar) and the mixture begins to simmer. Remove from heat. Add the gelatin mixture and stir it in until gelatin is completely dissolved. At this point, I started worrying I didn't have enough gelatin, with terrifying fantasies of serving my guests yogurt goo that just glops off the table and onto the floor, so I sprinkled in the second packet. This might not have been necessary, but my end result was so delicious it might be a good idea.

    Then transfer the liquid to a large bowl, cool for about 10 minutes, then remove the vanilla bean husk (people don't like eating bark. It's just gross). Whisk in the yogurt until it's well blended.

    You'll need 6 ramekins for this; brush them with butter or your favorite non-fat cooking spray. Divide yogurt evenly among ramekins and let set in the fridge for 2 hours to 2 days.

    THEN to make the syrup, you need 1/4 cup sugar, 1/4 cup water and some lemon juice. Simmer until the sugar dissolves, and then poor this over prepared orange quarters and let cool.

    To serve, gently run a butter knife between panna cotta and sides of ramekins to loosen. Place a plate over each ramekin and, holding plate and ramekin together, invert and shake until the panna cotta comes loose. Pour the syrup over, garnish with oranges (and I added a bit of homemade grenadine for good measure).

    Happy eating!

    Thursday, May 5, 2011

    Stress relieving through better cooking

    When you're stressed, what do you do? I eat and I cook. I love to cook. I'm sure you realize this. The last week has been supremely stressful. Not only is it the end of the year, but my good friend had to say goodbye to her sister last week after a brave battle with cancer. I've also had some personal/family stuff to deal with lately. So, I retreat to my kitchen to make delicious things.

    The first of these delicious things is clotted cream. I volunteered to host my class at my house this upcoming Monday when we will be discussing publishing a paper. My professor is British. I suggested we have proper tea in my backyard. Not only that, but I enthusiastically said "I'll make clotted cream!" Now, I have never made clotted cream before, nor actually did I even know what clotted cream was, but I knew it was something to serve with fancy tea. I was also sure I could take a stab at making it, and if it failed, oh well, the Co-op or the cheese shop probably sells the stuff anyways.

    Turns out making clotted cream is insanely easy. All you need is a pint of heavy whipping cream, a heavy bottomed pot with a lid, and an oven that can stay at 180* for a sustained amount of time (12-15) hours. All of these I had, so I gave it a go. At the end of the 15 hours I pulled the pot out and lo and behold, there was a thick, yellowish skin on the top of the cream. That, my dear readers, is the clotted cream (cue "ewwwww" from Becki).

    So, I skimmed off the skin, put it in a
    mason jar, and put it in the fridge. The stuff got rock hard, so I googled "how to serve clotted cream" and saw pictures of it in pretty shapes and learned that it's essentially butter, so it needs to be softened before serving.

    Well, as a big dorky archaeologist it turns out that I own a few wooden butter molds of the Amish persuasion. So, I let the cream soften, soaked the wooden molds, and stuffed them with the creamy buttery goodness. Voila! You can see the results for yourselves. I did one little one for each of us, and then made the remaining cream into a giant square with a star in the middle. I dare say, they will be impressed.

    Additionally I made grenadine. Look at the photos, doesn't it look delicious? All
    you do is boil down 32 oz of pomegranate juice to half its volume, take it off the heat, add 2c sugar and then 1 oz vodka (optional; it's a curing agent though, so if you want the stuff to last this step is essential). I had some Dry sodas (http://www.drysoda.com/) which are honestly the best things EVER, used a vanilla bean one, added an ounce of grenadine and it made the most AMAZING shirley temple ever. Seriously, do yourself a favor and make one now.


    Well, a girl can't subsist on this stuff only, so I had to make dinner. Dinner tonight was simple: shrimp boil (water, crab boil seasoning, shrimp) but OH NO! I had no cocktail sauce! So I made some! (are we seeing a trend here?) Here's how:
    2 tbsp ketchup
    1/2 tsp lemon juice
    2 tsp horseradish
    1 tsp worcestershire sauce
    Mix and YUM! Tasted just like the Beaver Brand stuff, but without the preservatives.

    This last recipe here is for Nikki. Please make this tomorrow and tell me how it is. I made roasted broccoli
    with a vinaigrette and pinenuts. So easy, and yet so good. Did you know broccoli has a nutty flavor if roasted? Yeah, I didn't either. I always had mushy steamed broccoli before. Never again I tell you! So here's how you do it:


    1 head broccoli
    some salt
    1 tbsp olive oil
    So, chop the broc up into little bite sized bits. Then throw it in a bowl, and add the above ingredients. Toss around so it's well coated. Place in oven at 400* and bake for... 10 minutes? When the broccoli reaches 10 minutes throw in a handful of pinenuts so they get nice and toasted. Leave in another 5 minutes or so.

    Meanwhile, mix together 2tbsp balsamic and 1 tbsp dijon mustard (I, of course, have some homemade stuff I like to use). When the broccoli crowns start getting a little browned pull 'em on out, throw back in the original bowl, pour the dressing over and toss. Voila, amazingness.
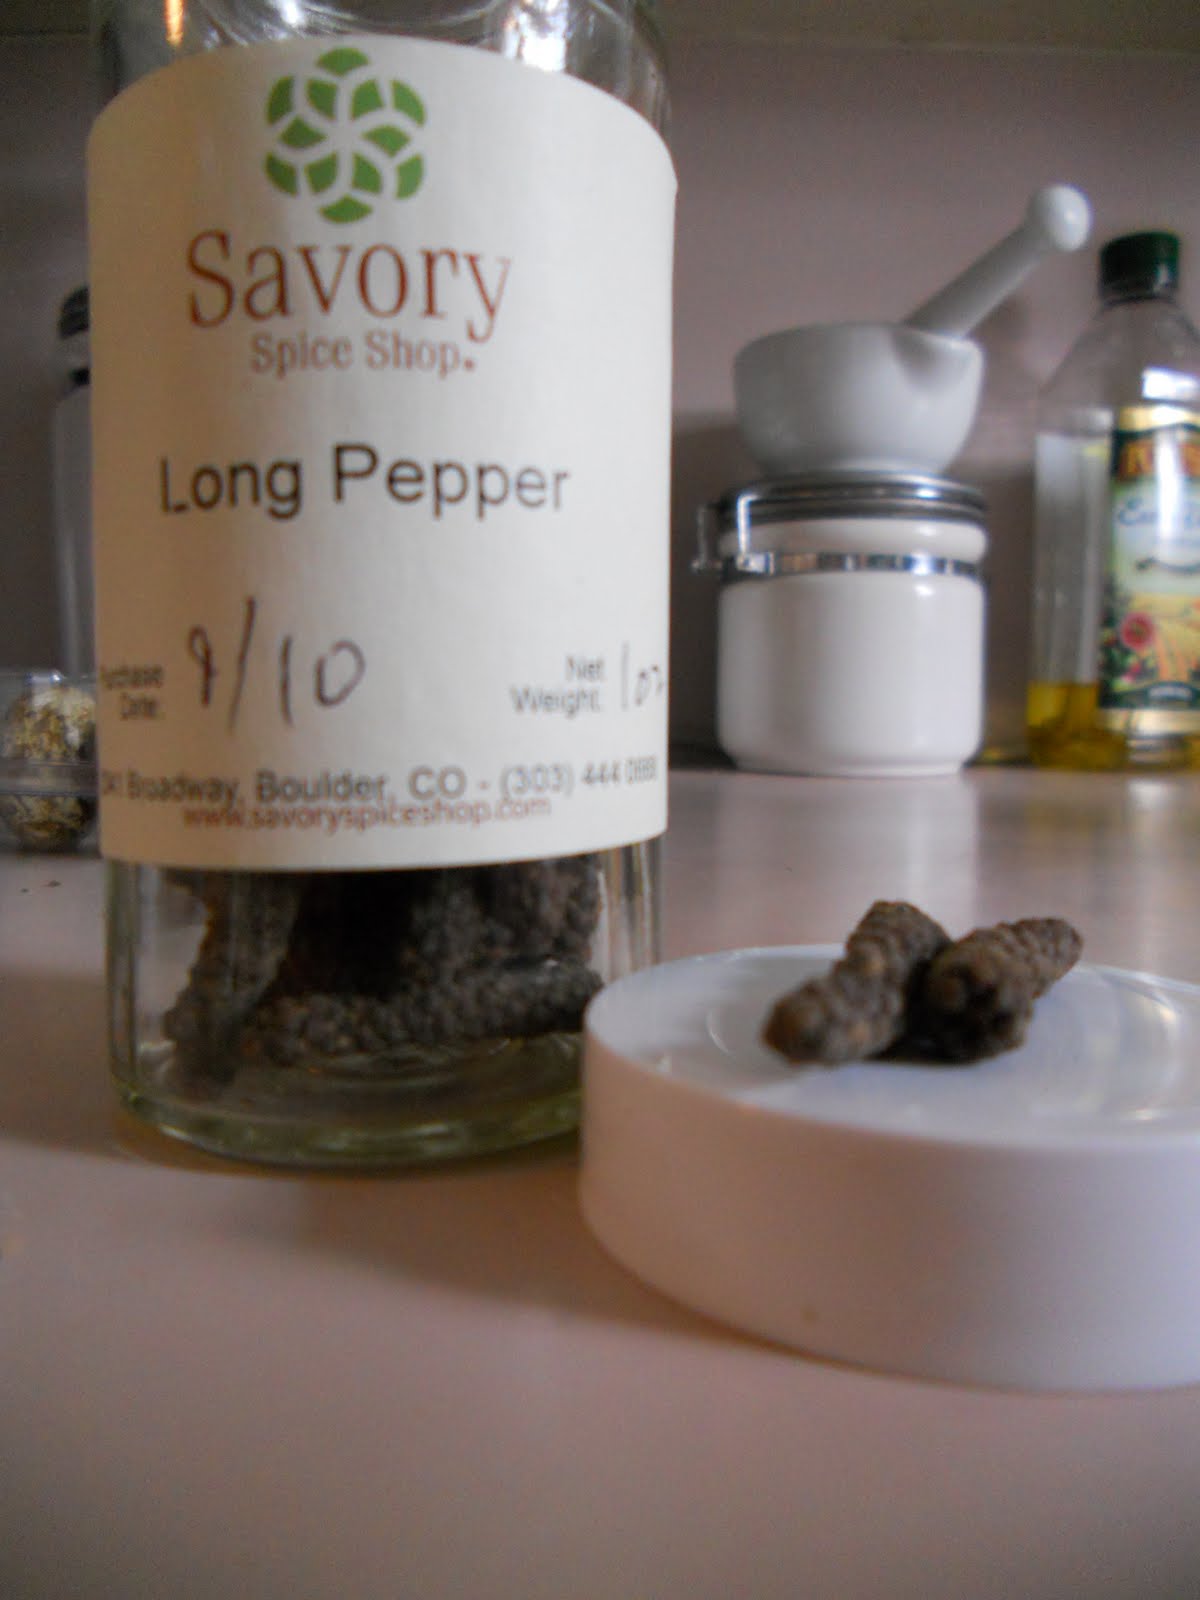
    Oh, and finally, I alphebetized my spice drawers the other day, and then ordered more spices from Savory Spice Shop in CO and they arrived today. Cue gratuitous picture
    of my spices.

    The broccoli was so good I just went back for a second helping. :)

    Tuesday, May 3, 2011

    End of the... year? Wow.


    So, last year I spent a very good amount of time cooking and fantasizing about blogging. This year I spent very little time cooking and feeling guilty about not blogging. Grad school got difficult, friends, and I'm sorry to shirk on my blogging duties.

    I have some catching up to do for sure. I've made some incredible dishes in the past many months. My favorite was a quail egg raviolone. The growers market here in town has a guy who sells quail eggs, and 24 of them followed me home. What do you do with 24 quail eggs? Well, a friend of mine pointed me to this newspaper article (http://www.saltyseattle.com/2010/01/quail-egg-raviolone-aka-inverted-carbonara/) and I adapted it a little. The recipe is below.

    First of all, I baked the raviolones, because I think baked ravioli is ambrosia. Second, I added a few other cheeses and some tarragon to the cheese mix.

    Today I also found the amazing website The Cupcake Project, whose name is ALSO Stefani and who ALSO loves making things from scratch. I feel like I have a compatriot in arms out there in the cyber world. I tried her grenadine from scratch and it's incredible; so much so I called my mother and had to tell her all about it. I'm also making her clotted cream (the real reason I ended up on her website). As it takes 8-12 hours to cook, it's still in the oven, but when I have proper tea with my British professor on Monday I hope to impress with the cream!


    Now that school is (almost) over I plan on posting more... my love of food keeps shining! Now I guess I should get back to finishing that paper... *sigh* The neverending flow of words from my fingertips is truly astounding.

    Quail Egg Ravioli aka Inverted Carbonara

    For the pasta:

    2 tbsp butter

    2 cloves garlic, minced

    4 sprigs thyme leaves, chopped

    1 tbsp dried tarragon

    ¼ c white wine

    Salt and pepper to taste

    1 lb whole milk ricotta

    1 c grated parmigiano reggiano

    1 c grated gouda

    Your favorite semolina-based pasta dough recipe to make 8 sheets 25” long by 5.5” wide

    24 quail eggs

    1 egg white whisked with 1 tbsp cold water for egg wash

    For the sauce:

    Four pieces of bacon, diced

    1 tsp Meyer lemon zest

    2 tbsp Meyer lemon juice

    ½ c white wine

    2 c heavy cream

    2 tbsp butter cut into four pieces

    1 bunch of asparagus cut into 1” pieces and very lightly steamed

    1 bag organic frozen peas

    1. To make the filling, sautee the garlic and thyme in the butter for 30 seconds, just long enough for them to release their flavor. Add the white wine, and reduce by half over medium heat. Remove from heat, add the salt and pepper, and mix with the parmigiano and the ricotta in a medium bowl. Refrigerate until needed to keep firm.

    2. Working with two sheets at a time, place four dollops about 1.5 tbsp each of ricotta mixture in equal distances along one sheet of pasta. Make a depression in each dollop large enough to contain one quail egg, though it’s ok if a bit of white spills over as it will help with cohesion. Crack one quail egg into each depression. Wash the edges and between the dollops/eggs with egg white. Carefully set the second equally-shaped pasta sheet over the first, and pinch together on the edges and between the quail egg dollops. Cut each sheet into four circles using a 5” cookie cutter or glass. Place each raviolo on a floured baking sheet and continue process with remaining sheets until you have 24 ravioli. Let them air dry for an hour or up to three while you’re making the sauce. Right before you put them in the oven, paint with melted butter.

    3. For the sauce, fry the bacon in a large skillet until fat has rendered and it’s crisp. Remove the bacon to a paper towel-lined plate, but keep as much grease in the pan as possible. Add the zest, juice and white wine to the pan. Reduce the wine by half over medium low heat. Add the cream and bring almost to the point of simmer, stirring constantly. Add the butter one piece at a time, stirring to fully incorporate. Adjust seasonings with salt and pepper, and keep warm over very low heat. Add the peas and asparagus 5 minutes before you plan to drizzle the sauce over the ravioli.

    To cook the ravioli bake at 350* for 10 minutes. YUM!